Categories
Painter

Safe Painting On Ladders

painting exterior on ladders

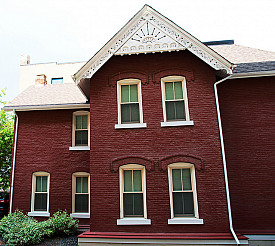
Some homeowners want to paint their home’s exterior, but the thought of working on ladders is enough to make them cringe, and they end up putting it off or hiring a professional. Painting at heights can be a daunting task, and it is a good idea to leave this job to a professional painter, or at least let them take care of the high soffits and roof areas.

This can be hazardous work and requires skill using ladders and sometimes even a harness system, as well as steady nerves. But if you are set to tackle this project on your own, there are important guidelines one should know to be successful and not end up on a stretcher! This article will discuss the methods of safe and effective exterior painting on ladders, so that you can paint your two- or even three-story home on your own.

The first step is to obtain the right equipment. This means a tradesman and fully functional ladder. Don’t borrow just any old ladder; you need it to function properly. Ladders are rated which indicate their durability in increasing order.

Grade-3 ladders are homeowner grade, and they can be quite narrow and are not advisable if working higher than 20 feet off the ground. Grade 1A ladders are very rigid, but the downside is that they are heavier, which can cause safety issues when moving the ladder. In most cases, you want grade 2 for painting; they are robust, rated at 225 pounds, and will also be light enough to maneuver safely.

You can rent ladders if necessary; you’ll need a 28′ or longer for many two-story homes to reach the second-story soffits, and third-story areas will require a 32′ or a 40′ ladder. It is usually more cost effective to buy a ladder or two, since you won’t be rushed this way, and you are saving lots of money anyway by doing this job yourself. For lower areas, you want a shorter ladder. Some of the most versatile are called “3-way” ladders, which can be set up as an A-frame, or a small extension ladder, which makes reaching various first story house extremities easier.

Read more over here.

Categories
Painter

Tips For Painting A Roof

painting a roof

Painting a roof can vary slightly depending on what material your roof is made of but there is one thing they all have in common and that is they must be cleaned before you apply any paint.

How To Clean A Roof

Depending on your budget and what you have available to you will depend on how you clean your roof. Using a high pressure water blaster is one of the best ways to clean a roof, specially any roof with a rough surface. You can use a broom and hose but you will need some type of chemical to help remove the mould from within the pores of the surface. This is where high pressure is good, it does get into all those nooks and crannies.

A roof with a smooth surface such as galvanised iron could be washed much easier with a boom, some detergent and a hose to wash it off after. High pressure is also good to use but it is not as important to use on smooth surfaces.

How To Paint A Corrugated Iron Roof

If you are painting a new iron roof you will need to wash it with a degreaser before you start unless the roof is more then a year old and has weathered. This means that the oil from fabrication has worn away and the iron has been slightly etched through weathering.

With unpainted iron you will need to prime it first with a suitable primer, this is also the case for any sheets of iron that may have been replaced on an existing roof.

You will need to apply two coats of suitable paint, and the choice of colour is up to you but do remember lighter colours will reflect the heat and darker colours absorb the heat.

Airless spraying is the quickest way to paint any roof and if you decide to paint your roof this way there is a technique to applying the paint. When you are spraying you should spray about a metre wide section and work your way down the sheet, spray in the direction of the flutes in the iron. If you like you can use the joins in the iron as a guide, it is an easy way to tell exactly were you are at. Once you have worked your way down the sheet and completed that section move back to the top of the roof and repeat for next sheet of iron. You must keep a wet edge at all times and that is why you go back to the top of the roof before it starts to dry, if you decide to work back from the bottom to the top, the top part could have tacked off when you get back up there.

Read more

https://youtu.be/_d5aZos33VE

Categories
Painter

PROTECT YOUR HOME’S EXTERIOR FROM WINTER WEATHER

protect exterior of home in winter

Unfortunately, we have little control over the havoc that winter weather can wreak on our homes. In New England, homeowners see snow ranging from light and fluffy to wet and heavy, dangerous ice storms and unforgiving freezing rain.

While you cannot secure your home in a bubble for the duration of the season, you can take some simple steps to help protect the exterior of your residence all winter.

Check Your Paint

During the fall season, we can see seasonably warm temperatures before winter weather arrives. Take advantage of these mild days to get outside and inspect your home’s exterior paint job.

If you notice buckling and chipped paint or rotting wood, act now to ensure the damage does not worsen over time. Make your paint touch-ups and contact a professional to evaluate the state of the wood.

Clean the Surface

Pressure washing is popular maintenance in spring, but it should be done in the fall too. When winter arrives, you may not see your lawn, porch or fence without a pile of snow on top for several months.

If you clear away dirt and debris beforehand, you are protecting these surfaces from further contamination. For your paint in particular, it is better suited to face the elements clean than dirty.

Read more

You can also visit us here for more information:


Categories
Painter

Tips and Techniques for Antiquing Wood

Tips and Techniques for Antiquing Wood

“Aged”, “antiqued”, “distressed” … these are some of the adjectives that people use to describe how they envision the finish on their cabinets or furniture. From an artist’s perspective, these are very vague terms. They cover a full spectrum of different techniques that all fall under the generalized category of “antiquing”. There is a big difference between a little bit of color in the corners and truly “aged”.

The charm of “aging” is that it represents what happens naturally over time as previous finish treatments are exposed to different elements. For example, there is more wear around edges and handles. Dust settles low. Sun shines inconsistently on vertical surfaces and causes layers of paint to fade and split. Horizontal surfaces and corners take the brunt of the burden for scuffs and scrapes. When done correctly, these pieces actually tell a story. It is helpful to create a mental image about how the object was used or where it was as each layer and technique is applied.

It is important to define exactly how “old” you want it to look. Begin by gathering photos that will show examples of your expectations. You may already have a small piece, like a picture frame, that will provide inspiration. One client even took me outside to view her weathered shutters!

Read more here

You can also visit us here for more information:

Categories
Painter

Challenges with Painting a Brick House

Challenges with Painting a Brick House

Thinking about painting your brick house? Think again … and even a third time. While coating brick walls with a shade of sunny yellow or crisp white will certainly brighten the appearance of your property, you may be dismayed to find that it’s not easy to paint brickwork with a professional touch, and it will sharply increase the amount of maintenance your home’s exterior requires.

Read all about the advantages of unpainted brick, as well as alternative ways to give your outside walls a fresher, more modem look without painting.

Advantages of Unpainted Brick
Low Maintenance. Unpainted brick is surprisingly low maintenance. It’s durable and doesn’t peel or bubble, even in harsh weather; in fact, its “built-in” color actually develops an attractive patina as it ages. Once you put that paintbrush to the surface, however, you’re committing yourself to regular repainting. Even if the idea doesn’t faze you, think of its impact on curb appeal. When you eventually put your home on the market, many potential buyers will be turned off by the prospect of all that upkeep.

Weather Resistance. Another advantage to just leaving your house exterior alone is the fact that bricks are made from a kiln-fired mixture of clay and shale, which is naturally porous. This quality allows brick walls to breathe, expelling moisture as your home goes through rainstorms or freeze-thaw cycles. Painting, unless meticulously done with high quality, vapor-permeable masonry paint, tends to trap dampness and cause your bricks to crumble, often in as short a period as 5-10 years. The deterioration will be hidden beneath the paint, making it difficult to spot — and treat in the early stages.

Read more here

You can also visit us here for more information:

Categories
Painter

Tips For Painting Accent Walls

tips for painting accent walls

I took an excerpt from this interesting article by The Spruce. To read more about these tips, head over to their blog post.

Accent walls are alive and well in the decorating industry. These easy and stylish color accents will always be popular because of their flexibility. You have unlimited paint options for your accent wall, as well as other surfaces and materials. Even the location of your accent wall is purely personal. Your home is unique, so your accent wall should be just as special. Accent walls can be used in any room if you know the essential dos and don’ts.

DON’T shy away from using a bold color for your accent wall. As long as you have the right accents around the room to coordinate with your new color, you can choose whatever color makes you happy.

DO think outside of the box when you are considering your new accent wall. You are not limited to simple wall paint covering the wall. Think about other ways to use paint color. Your accent wall may be perfect for stripes or for a specialty paint finish. Metallics are powerful style statements for an accent wall.

DON’T forget that there is more to accent walls than just paint. Have you considered stone or tile for your accent wall? Extensive shelving can also work as an accent wall in a room that lacks an architectural feature and lacks storage. Your accent wall can also include a gallery of photos or artwork or even a fabric-draped wall. The secret to accent walls is that they are the most flexible decorating secret weapon you can have. The only rule for accent walls is that they accent a wall. That’s it.

DO consider an accent wall even if you’re keeping your room neutral. Accent walls can work just as well in a neutral color, as a bright one. The initial idea of an accent wall conjures up visions of bright red or blue, but in a neutral color scheme, a dark brown wall is just as dramatic.

DO take into account the color on your other walls. Most accent walls look best when they adjoin walls in a light to medium shade. Accent walls in an all-white room are stunning but tricky. The contrast of a bright accent wall against white walls can look very modern and even stark. Balance your strong accent wall color with neutral wall colors on the other walls. Your neutral walls can be gray, or greige, or beige, whatever works best with your accent color. if you do choose to accent a wall in a white room, soften the contrast with mid-tone accent colors to bridge the difference.

Categories
Painter

How To Know When Your Roof Needs Painting

know when your roof need painting

Read this informative article by GC Paint Center

In order to maintain your roof, experts agree that a roof should be repainted at least every 5 years. This not only ensures your roof always appears in a pristine condition, it also allows one to address any minor problems such as leaks and rust before they may become larger ones.

Whether it’s tiled or corrugated, painting your roof is a great way to add value to your home. To get the job done properly and safely, it’s important to prepare thoroughly and use the right equipment.

Cleaning

Before you start painting, you need to give your roof a good clean. Give the the entire roof a high pressure wash, you can use sugar soap as well to get rid of dirt and grime. A high pressure wash is the quickest way to clean corrugated roofs. You can also use a hose and scrub down with a broom on tiled roofs.

Preparation

Make sure that all surfaces are clean and free of any loose particles.

Never !! paint over surfaces on which the paint is failing, the area in between which seem to be sound are already weak and will soon fail.
The new paint will tend to pull the old system off if not prepared properly.

Check the condition of the roof as follows:

When the surface is dry, press a length of masking tape securely onto the roof surface, then pull it off quickly. Examine the adhesive side of the tape. If no coating is removed, and no dirt or chalky material is apparent, then the surface is ready for the first coat of paint.

If, with the tape test method, the paint coating is removed, you need to strip the existing paint film.

On unpainted galvanized iron remove any rust, clean with galvanized iron cleaner,rinse thoroughly and give it a coat of primer.

Choosing Your Paint

Calculate the area of your roof and buy enough paint to apply two coats. Remember that darker colours absorb heat and lighter colours reflect it.

Painting a Tiled Roof

The best and quickest way to paint a tiled roof is with an airless spray gun but you can also use a brush. Use water-based paint but if your roof has lost most of its colour, apply a thick coating of sealer first.

Painting Galvanized Iron Roofs

Film thickness is the actual amount of paint on the surface. The most common problem is that only one coat is applied. Even more serious is when water is added to the paint and only 1 coat is applied.

Two coats must be applied.

Allow at least 4 hours drying time between coats.

You can apply paint with a brush, roller or airless spray.


Categories
Painter

How to paint doors and trims

how to paint trims

Create a welcoming entrance to any room of the house with the right tools and techniques for the job. See this interesting article by Dulux Paints.

Instructions

1. As tempting as removing your door immediately is, don’t. Take a look at how much room is between your door and the frame when it’s closed. If it’s a tight fit you may need to sand the edges to allow for extra coats of paint. It’s a little trick that can go a long way.

2. Now that’s done you can begin removing your handles and anything outstanding such as coat hooks. Using a couple of door stops, wedge the door securely while you remove the hinges.

TIP: Leave one screw on each hinge to support the weight of the door and make removal safer.

3. Once the door is off its hinges, lay it flat across a pair of sawhorses, chairs or even a table. Wash the surface thoroughly with Selleys® Original Sugar Soap before painting.

4. If your door has already been painted with enamel, give it a light sand until the shine has become dull. Wipe off the dust, and then you can then use Dulux 1 Step® Primer Sealer Undercoat to undercoat the door before applying a topcoat.

5. Stir your Dulux Aquanamel® to ensure even colour throughout the paint can. Using a synthetic brush, paint the mullions first, main panels second, then the rails, followed by the styles and finally the edges. In simpler terms, start with the shortest panels, and work towards the longest panels. When the door is dry, flip it over and repeat the process.

TIP: Work quickly to prevent the paint from drying and creating streaks.

6. Before applying a second coat, give your door a light sand with 360 grit sandpaper, and then thoroughly wipe down the surface.

7. And you’re done! Simply clean up using responsible paint disposal methods and enjoy your new look.

If you need more information, you can learn more by visiting the following sites: